


Convert Image to PES for Embroidery in Just a Few Easy Steps

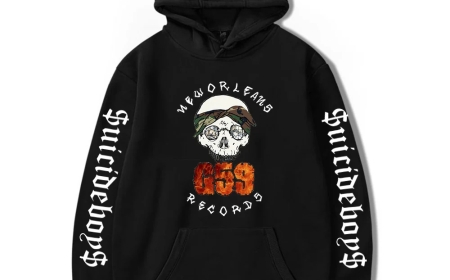
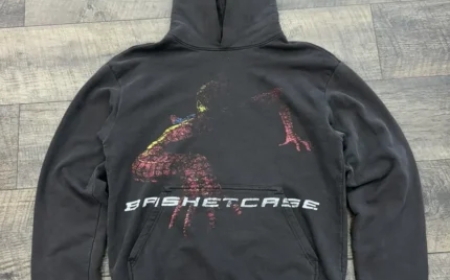
That perfect image you want to stitch onto a hat or jacket isn't ready for your Brother embroidery machine yetit needs to become a PES file first. Converting regular images into embroidery-ready PES files might sound technical, but with the right approach, you can transform your favorite designs into stitchable art without needing a degree in digitizing. Whether it's a company logo, custom artwork, or a sentimental photo, the process toconvert image to PES for embroidery follows some straightforward steps anyone can master.
Why You Can't Just Stitch Any Image
Your embroidery machine doesn't work like a printerit needs specific instructions about where to place each stitch, when to change threads, and how to move the needle. A PES file contains all these commands in language your Brother machine understands. Regular image files (like JPEGs or PNGs) lack this crucial information, which is why conversion is necessary.
The catch? Not all images convert equally well. The best candidates for embroidery:
- Have clear, bold outlines
- Use limited colors (6 or fewer works best)
- Avoid tiny details that won't stitch cleanly
- Feature good contrast between elements
Step 1: Prepare Your Image
Before conversion, optimize your image:
Clean Up the Design
- Remove unnecessary background elements
- Increase contrast if needed
- Simplify busy areas that won't translate well to stitches
Resize Appropriately
- Measure your target embroidery area
- Size your image accordingly (remember, 3" wide is typical for hats)
- Ensure key details remain clear at the smaller size
Choose Your Colors
- Reduce colors to essential ones only
- Match to available thread colors using a conversion chart
- Ensure adjacent colors have enough contrast
Step 2: Select Your Conversion Method
You've got several options to create that PES file:
Online Conversion Services
Best for:Quick results without software
How it works:
- Upload your image
- Select PES as the output
- Download your file
Top services:
- The Digitizing Hub
- Embrid Online
- SewArt Auto-Digitizing
Embroidery Software
Best for:More control over results
Top programs:
- Hatch Embroidery (user-friendly)
- Brother PE-Design (made for Brother machines)
- Wilcom Embroidery Studio (professional-grade)
Mobile Apps
Best for:Quick conversions on the go
Try:
- Embrilliance Express
- StitchBuddy Mobile
Step 3: Adjust Stitch Settings
If using software, you'll need to specify:
Stitch Types
- Satin stitches:For outlines and text (shiny, smooth)
- Fill stitches:For large areas (various patterns available)
- Running stitches:Fine details
Density
- Typically 0.35-0.45mm between stitches
- Denser for thicker fabrics
- Lighter for stretchy materials
Underlay
- Adds stability beneath visible stitches
- Essential for preventing puckering
Step 4: Export as PES
When satisfied with your settings:
- Select "Save As" or "Export"
- Choose PES format
- Select the correct version for your Brother machine
- Name and save your file
Step 5: Test Before Final Stitching
Never skip these quality checks:
Virtual Preview
Most software shows how stitches will lookcheck for:
- Misaligned elements
- Jump stitches that are too long
- Density issues
Actual Stitch-Out
On scrap fabric:
- Use the same material as your final project
- Include all planned stabilizers
- Watch for thread breaks or tension issues
Wash Test
Ensure the design:
- Maintains its shape after laundering
- Doesn't bleed colors
- Stays securely attached
Troubleshooting Common Conversion Issues
Problem: Blurry Details
Fix:
- Simplify the design
- Thicken fine lines
- Use satin stitches instead of fill for text
Problem: Puckering Fabric
Fix:
- Reduce stitch density
- Add more underlay
- Use appropriate stabilizer
Problem: Thread Breaks
Fix:
- Shorten stitch length
- Adjust machine tension
- Choose higher quality thread
Pro Tips for Better Conversions
- Start simple- Master basic designs before tackling complex ones
- Digitize larger than needed- Easier to scale down than up
- Study professional files- Open them in your software to see how they're built
- Keep a settings log- Note what works for different fabrics
- Build a library- Save variations for different applications
When to Call in the Professionals
Consider expert digitizing when:
- Your image has photographic elements
- You need specialty effects like 3D puff
- The embroidery will be very small
- Brand consistency is critical
Many services offer rush turnaround if you're in a pinch.
Maintaining Quality Across Items
Create separate optimized files for:
- Hats(smaller, curved surface)
- Shirts(consider stretchiness)
- Jackets(thicker material)
- Towels(needs topping)
The Business Case for Proper Conversion
Taking time to convert images correctly:
- Saves money on wasted materials
- Produces professional-looking results
- Reduces frustration during stitching
- Creates files you can reuse for years
Future-Proofing Your PES Files
- Store original images and PES files together
- Keep notes on ideal settings
- Create size variations before you need them
- Back up everything in multiple locations
The Bottom Line
Converting images to PES files opens up endless creative possibilities for your Brother embroidery machine. While the process has a learning curve, following these steps will help you transform ordinary images into extraordinary stitched designs. Rememberevery stunning piece of embroidered art started as someone's careful conversion work.
Now that you know the steps from image to PES file, that design in your head (or on your screen) is closer than ever to becoming wearable art. Happy stitching!